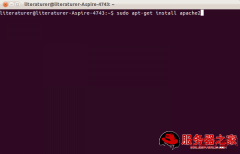
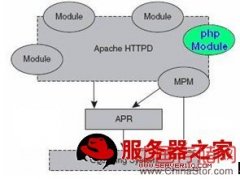
本文介绍apachevirtualhost虚拟机配置,希望对于初学Apache服务器相关的朋友有帮助,更多Apache安装、配置、报错处理等资源请本站内搜索。
1. 首先修改apache 的conf 文件,vi /home/http/conf/httpd.conf 增加如下选项
NameVirtualHost *
# www.server110.com
ServerAdmin [email protected]
DocumentRoot /home/http/htdocs/server110
ServerName www.server110.com
ErrorLog logs/server110-error_log
TransferLog logs/server110-access_log
#acer.server110.com
ServerAdmin [email protected]
DocumentRoot /home/http/htdocs/acerserver110
ServerName acer.server110.com
ErrorLog logs/acerserver110-error_log
TransferLog logs/acerserver110-access_log
2. 增加完成后,通过 /home/http/bin/apachectl -t 检查语法格式的问题,并通过/home/http/bin/apachectl -S 检查虚拟主机的相关配置;
如果配置正确将得到以下信息
default server www.server110.com (/home/http/conf/httpd.conf:??)
port * namevhost www.server110.com (/home/http/conf/httpd.conf:??)
port * namevhost acer.server110.com (/home/http/conf/httpd.conf:??)
Syntax OK 3. 由于配置前并没有把acer.server110.com 的目录放在指定的/home/http/目录下,造成了访问出现404 错误提示,禁止访问;在日志文件中得到
[error] [client 192.168.1.1] (13)Permission denied: access to / denied 错误信息log 日志, 修正后才可以通过远端来分别访问虚拟主机WEB 页面。
二、配置本地Eth0 邦定多个IP
linux的网络设备配置文件存放在/etc/sysconfig/network-scripts里面, 对于以太网的第一个网络设备,配置文件名一般为ifcfg-eth0。如果需要为第一个网络设
备多绑定一个IP地址,只需要在/etc/sysconfig/network-scripts目录里面创建一个名为ifcfg-eth0:0的文件,于是参考ifcfg-eth0 直接cp 为ifcfg-eth0:0 ,并修改为:
DEVICE=eth0:0
BOOTPROTO=none
BROADCAST=192.168.10.255
IPADDR=192.168.10.100
NETMASK=255.255.255.0
NETWORK=192.168.10.0
ONBOOT=yes
TYPE=Ethernet
USERCTL=no
PEERDNS=yes
IPV6INIT=no
如果需要再绑定多一个IP地址,只需要把文件名和文件内的DEVICE中的eth0:x加一即可。LINUX最多可以支持255个IP别名。
三、 建立基于IP 地址的虚拟主机,编辑/home/http/conf/httpd.con 文件,增加如下参数
NameVirtualHost 192.168.10.100:8080
ServerAdmin [email protected]
DocumentRoot /home/http/htdocs/server110_ip/
ServerName www.ipserver110.com
ErrorLog logs/ipserver110-error.log
TransferLog logs/ipserver110-access.log
Listen 8080
声明: 此文观点不代表本站立场;转载须要保留原文链接;版权疑问请联系我们。


